|
1965 Mustang Headliner Installation - Part 2The 1965 Mustang Headliner installation continues, now that the weather is warmer. The sun and heat will help you to achieve a nice professional fit. So lets get busy and put in the new moonskin headliner.
You may have noticed from the last installment, that I mentioned it was a good idea to wait for warm weather, or at least mild weather and sunshine. That's because your nice new headliner kit is probably enclosed in a box that's about a foot square, meaning that you will have a whole lot of creases in your new headliner material. The warm sun not only helps to get those wrinkles out of the new roof material, it also softens it up so that it can be stretched much easier. This isn't so much an issue for an upholstery shop, who has special pulling tools and may use a heat gun if necessary, but for those of us who may only do this once or twice in a lifetime, why take a chance and melt your new headliner? Final Preparation - Sound deadenerMaterials and Tools
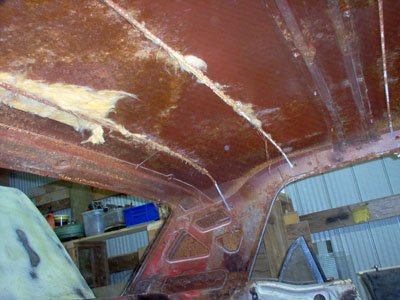
At the one hand, some people don't bother even replacing it, while at the other, people will add either some underlay foam, dynamat or hot water tank insulation ( the stuff with the silver mylar on one side).
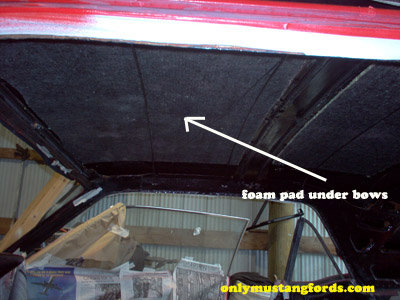
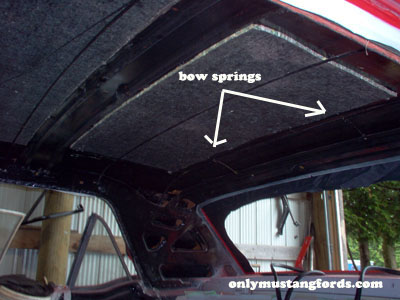
This isn't a recommendation or a suggestion, I just like the stuff in my 1965 Mustang headliner installation. Use whatever you think works best for you. The three main places where 'm putting this foam material, is two pieces between the front and rear division of the center roof bow (and attachment point for the overhead console or the optional dome light) and at the side "B" pillars behind the rear quarter windows. This area typically picks up a lot of road and tire noise being just under the inner and outer wheelhouse sections.
Headliner glue, or trim adhesive, is just a type of automotive grade contact cement. The key here, is that you need to coat both, the roof section and the foam or mat and let it get tacky before pressing the pieces together. Some commercial materials already have peel away adhesive on one side, so you can eliminate the trim adhesive on these pieces and save the adhesive till later steps. All done? OK now on to the not quite so easy part. 1965 Mustang Headliner Installation StepsMaterials:
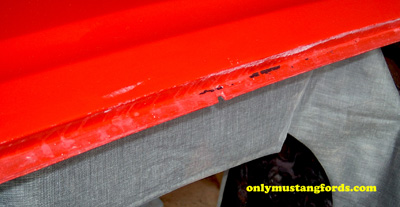
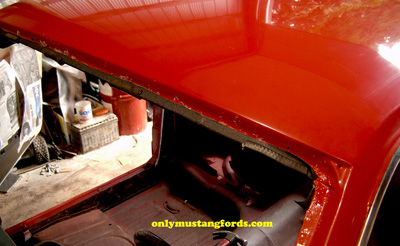
Whether you doing a 1965 Mustang headliner installation or replacement like mine, or another early vehicle, you may can find yourself faced with the fact that the leading edges of your headliner are glued to the front and rear window ledge, physically under the windshield and it's rubber gasket weatherstrip, meaning that the front and rear windshield has to be removed in order to put your new headliner in.... sigh! Newer vehicles, have an actual headliner form, usually made out of fiber board or cardboard, on which the vinyl or cloth is attached, making headliner replacement much easier.
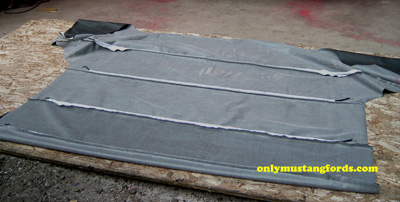
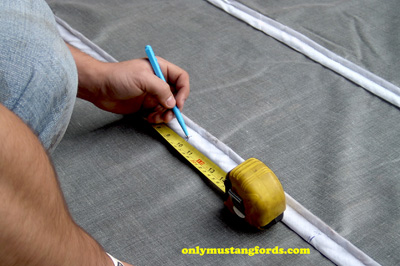
Make sure that the edges are free of old headliner material, glue, rust etc. Remove any old windlace (that vinyl trim stuff on the sides, that is pushed on to hide the raw edges on the door edges and elsewhere). 3. Prepare the new headliner. Locate the center of the material on both, the front and rear ends and mark them if yours doesn't come with a notch, like you see in the pictures. Mark the center of your car's roof at the front and rear attachment points too, for future reference with a piece of tape. The 1965 Ford Mustang, fortunately has a notch in the sheet metal right at mid point (see picture) so on mine, this was not necessary. Ford Mustang roof bows are color coded at one end from the factory, as are replacement bows. Mine were rusty, and had no color. Fortunately, in this case, there was enough of the old material left, that the bows were still in their respective places. If you mess up the order, your headliner won't look right and may not fit period. It's also helpful, if you had the old headliner as a reference, to note which of the holes that your bows were fit into. The holes can make it possible to either raise or lower the height of the material or adjust the spacing for a better fit. Plus, taking a picture of how they looked when you took out the old headliner helps too!
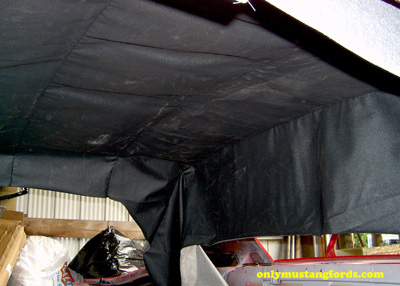
6. Add the rear support springs. The two little springs that hook to the rear bow hold it into place and support the rest of the installation. Carefully snip a slit into the backing tube so that each spring can be clipped onto the rear bow and anchored into the rear mounting holes. Miss this step and your 1965 Mustang headliner installation is going to be a mess!
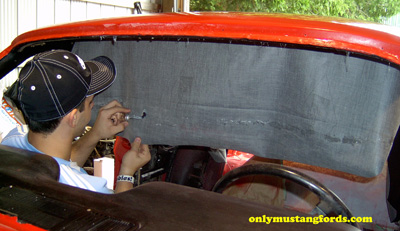
8. Now comes the fun part. Attaching the headliner to the front windshield edge. HINT: To make finding screw holes for the rear view mirror and shades easier, some people put the screws in before headliner installation and then cut a small slit to expose them. (easier to find a protruding screw than what feels like a small hole).
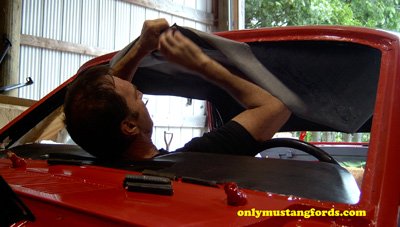
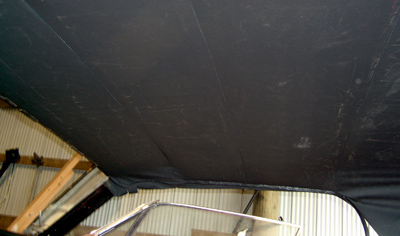
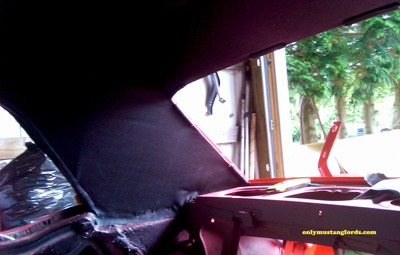
Now spread trim adhesive onto both sides of the headliner contact edge and the windshield frame. (it may help to coat the metal side and quickly press it to the moonskin so you know where to add the glue. Then, now that you have a good idea of where to glue, finish up gluing the front edge that had the clip on it. When it's tacky, take two hands and give the front headliner a good solid pull at the middle, aligning it with your marks on the roof and fold it over the lip of the windshield frame. Clip it to the windshield frame with the windlace or clip. 9. "A" Pillar. The windshield pillar, or "A" pillar needs some trimming and a small slit to make a nice even surface as it rounds the corner of the windshield edge. Once both sides look good, you will continue the stretching, gluing and clipping until you achieve a nice even look at the door edge sides.
10. The 1965 Mustang coupe has a row of small "teeth" at the bottom of the "B" pillar to grab and hold tension on the lower part of the headliner. Be careful! Make sure you pre-stretch your vinyl moonskin far enough to ensure that when the teeth grab, you'll end up with a smooth surface. A few near misses and you can end up with a bunch of tiny pin holes in an otherwise nice looking 1965 Mustang headliner installation.
Note: Your 1965 Mustang headliner installation will be less traumatic if you remember that a lot of times you'll need to pull the material in two directions at the same time. For instance at the back corners, you may be pulling the moonskin both, back to the rear of the car and to the left or right at the same time until it looks right.
12. Final Tip. Keep the clips on until you are ready to install the windshield on your Mustang. This ensures that for your 1965 Mustang headliner installation will stay perfect. There is almost no way for the material to shrink back and wrinkle while it waits for the windshield installation.
Sun Visor and Rearview Mirror AttachmentRecently, I was asked how can you find the rear view mirror attachment holes through the headliner and install both, the mirror and sun visors. Follow the blue link to the how-to information and pictures showing the mounting brackets, which are spot welded to the under side of the roof. Although, the question is for 1966 Mustang sun visor placement, the answer and pictures apply to all early Mustang coupes and fastback cars, as well as newer pony cars, with the rear view mirror attached to the windshield and only a visor mount on the roof mount.
Other Mustang Restoration SectionsPart 1 - Mustang Restoration
|


