|
1965 Mustang Restoration Part 4Inner and outer Fender Removal and RestorationThings are moving ahead on the 1965 Mustang Restoration. Part 4 covers removing, cleaning and sandblasting the Mustang's inner fenders and suspension. This is also the time to find any hidden problems such as rust, poorly done previous repairs and repair them.
Fortunately, there are aftermarket fender bolts, clips and other pieces that may not have survived the ravages of time in a form that makes them easy to reuse. Important: If you plan on showing your freshly restored Mustang it will be important to look closely at those fender bolts you find. Aftermarket auto stores stock bolts which will fit, but will not be correct in look and/or finish and that goes for Mustang specialty shops and online stores. If you want factory correct pieces for your 1965 Mustang restoration project car, they are available from most, but not all suppliers and usually at a significantly higher cost. So know what you need and order them appropriately. 1965 Mustang Outer Fender Removal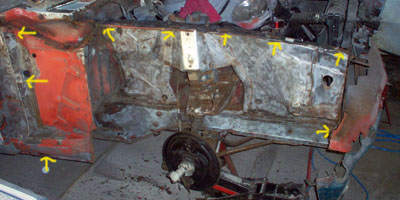
My 1965 Ford Mustang coupe has been sitting in storage for over 20 years, which has it's positives. The biggest of the benefits, is of course, no exposure to the elements, for those two decades. However, pulling the fender off safely, was still a bit of an issue. The negative, is that not one of these old bolts and nuts have moved in at least that many years. Those of you from the rust belt don't have to tell me how lucky I am when you see what it took to remove the fenders. I grew up with rust buckets and know very well that before you learn how to repair them, you'll first learn about removing the old rusty parts at the School of Bleeding Knuckles. Rusted-on fasteners on my 1965 Mustang restoration make a simple job take much longer. I started off removing the top fender bolts from the project Mustang. Naturally the first couple of body bolts came off without a hitch, giving me a false sense of security! The next few were not so kind. The Mustang uses a "captive nut" assembly, which basically is a spring steel clip with a nut welded to it. When new, these fasteners are quick to snap in and allow you to attach the fenders without needing a second wrench to hold the nut. When they get rusty, they weld themselves together and under heavy wrenching, will usually spin or break. Sometimes that can be a good thing.... After some sweat and liberal applications of penetrating oil, I was able to remove a few more of the bolts. The final two ( top near the upper hinge and the one at the bottom of the fender, broke themselves off. They'll be coming off the rest of the way with a hacksaw or the cutting wheel of my grinder.
Inner Fender Clean Up and Restoration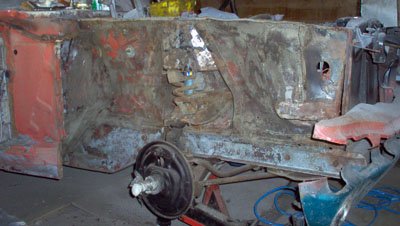
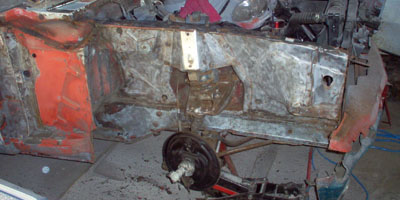
If your Mustang inner fenders are still the way they way they came from the factory, you'll have a lot more to do. Ford made them look nice, with body color inner fenders and a black upper shock/spring cover. So no rust outs, or major issues appeared as I removed the undercoating and the original paint beneath it. What I did find, though after sand blasting, was pin holes in the passenger side floor, which I hadn't seen when I first found the car.
Sand Blasting, Grinding and Sanding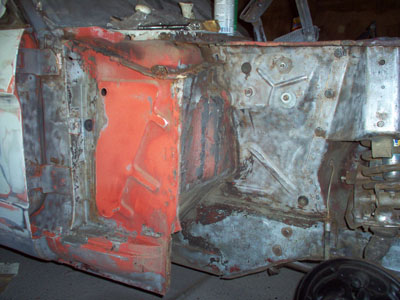
After chipping off as much undercoating as possible I started sand blasting with my mini sand blaster. It's not as fast as a big commercial unit, but it does the job for small areas like this. Any major rust would either have to be cut out, or ground down with a grinder and refinished. Many 1965 Mustang restorations at this point would require a partial or complete new inner fender or more. If you're looking for the perfectly accurate restoration, you may want to skim coat some of the areas with body filler, that have had nicks or small dents from rocks or other debris. That will give you a flawless smooth surface to repaint the inner fenders to the original factory look.
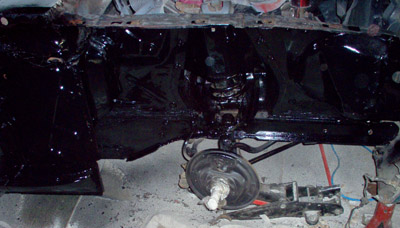
Sealing and protecting the surfaceI've now coated the area with a bonded on rust inhibitor and sealer. It's a hardened coating that needs "teeth" to grip properly, so the rough surface from the sandblaster doesn't need to be smoothed.
Note: This stuff dries rock hard, so it will either need to be sprayed with appropriate self etching primer or scuff sanded to ensure that the new paint stays put.
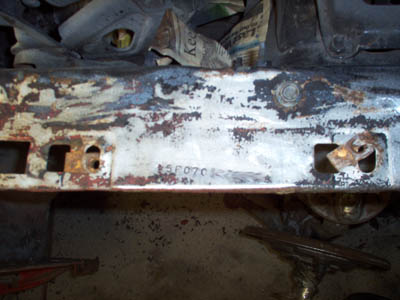
Some 1965 Mustang Restoration Hidden GemsWhen I found this car, I couldn't find the VIN number ( vehicle identification number ) through the factory cut out on the driver's side inner fender. And the door tag was gone as well. Fortunately the early Ford Mustang has several "hidden Vin numbers" located under the fenders. I assume this is so that if one of these area are replaced with crash parts, you can still find a good VIN for registration of your car. One of these "secret locations" is found on the passenger side inner fender hidden by the lip of the outer fender. Restoration SectionsPart 1 - Mustang Restoration
Return from 1965 Mustang restoration to Ford Mustang home. |


