Replace Mustang Sun Visors
Ford Mustang> Mustang Restoration> Replace Mustang Sun VisorsReplace Mustang sun visors the easy way! Early Ford sunvisor replacement is simple and that's a good thing too, because there's no way for the average enthusiast to repair or recover them.
They're also relatively cheap (I mean inexpensive..) and they take little more than a decent Phillips screwdriver, elbow grease and maybe an hour of your time.

It's a great first restoration project and a nice way to start learning how to restore your classic Ford pony car.
This article covers both straight replacement on an interior with existing headliner, as well as how to make it easiery to install all new visors on a car while you replace your Mustang's headliner.
Tools Needed: Headliner In Place
- Phillips screwdriver
- vice grips or other locking pliers
- bench Vice if no locking pliers available
- can of silicone spray
- 2 new chromed visor swing arms and 2 new sun visors
Sun Visor Removal
It's extremely easy to replace Mustang sun visors and their mounting assemblies on a first generation car with existing headliner.

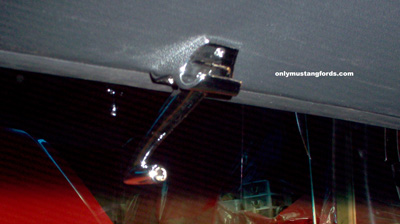
Each sunvisor is held by 3 screws onto to their brackets, which are welded onto the roof by the factory. The other end is simply clipped onto a round receptacle that is cast into the car's rear view mirror on 1965, 1966 and 1967 cars.

Using fairly strong pressure, carefully, remove the three chrome (maybe rust colored now) screws. The headliner material is quite thin so make sure that your screwdriver doesn't slip or you'll be needing to dig further into the headliner replacement section.
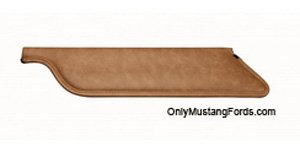
The interior of the body of your new visors contain a steel reinforcement that allow the unit to effectively hinge up or down allowing you to hold the visor in any position. Unfortunately, this makes them a Bear to remove or attach the little chrome bracket pins and the swivel arm ends.
You may need to gently tug the sun visor from its mount, as the swivel arm and spring that attaches to the base are recessed into the hole in the mounting bracket.
If You Are Doing A Full Mustang Restoration
If this is part of a complete Mustang restoration, you will be getting rid of the old units completely. But don't throw them away just yet. They're handy to use as a reference as to how deep to push the new vinyl exteriors onto the brackets. And if you are only replacing the vinyl parts, you'll be keeping the chrome units to reuse on the new ones.
My experience, is that for the $12 or $13 bucks for a pair of new ones, it doesn't make sense to use the old pieces. Replace Mustang sun visors and their brackets. When those old sunvisors were on, they probably didn't seem too bad, but with the nice new ones, all of a sudden you're going to notice every nick and rust spot on their little 40 plus year old surfaces.
If you do intend to use the original parts, grab your locking
pliers or vise and get a good hold of them, twisting them to remove
them. I have better luck putting the brackets into a vise and then pull
and twist them out of the old units. Installation of the bracket pins is
a bit challenging too. The best way I've found to get these things on, is to spray
a coat of silicone or wipe a thin film of white lithium grease on the
chrome arms before trying to push them onto the visors.
After
that, simply push the spring end of the bracket into the hole,line up
the three screw holes and install the screws. That's all you need to
replace Mustang sun visors on both, coupes and fastback cars.
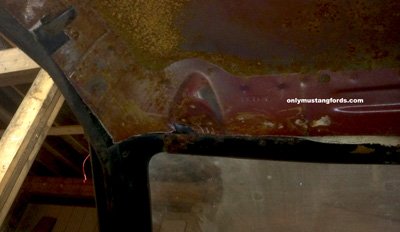
1965 and 1966 Mustang Mirror Brackets
This goes for 1964 1/2 models too. The center bracket for early cars is also the casting for your rear view mirror. Unless you plan on replacing the mirror, or removing the headliner on a complete headliner replacement, you can safely leave this piece mounted.
Tools Needed: Headliner to be installed
- Phillips screwdriver
- vice grip or other locking pliers
- vice if no locking pliers available
- can of silicone spray
- Exacto knife or razor blade
- 2 new chromed visor swing arms and 2 new sun visors
The installation procedure for cars with new headliner going in is almost the same. But here's where a few minutes of preparation can save hours of frustration. With your Mustang's headliner out and a bare roof cavity, it looks like a really simple process to pop the new visors in, once the headliner is attached.
Once the new material is taught and in place however, it becomes really difficult to find the small indentations for the screws. To solve this issue, take your six chrome trim screws and partially screw them into the metal sunvisor brackets so that at least 1/4 inch of them is protruding above the bracket.
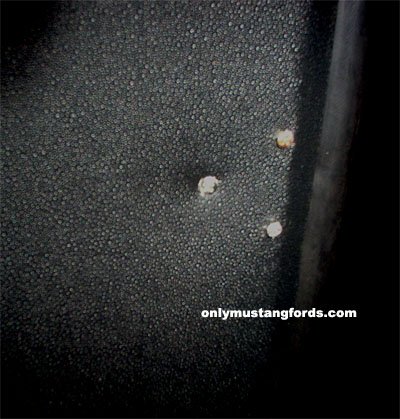
Then, once your new headliner is installed, simply press your fingers in the area of the brackets to find the screw heads, then score a tiny X against the screw head and push the headliner around the screw.
Once you have all of the screws showing, one-by-one, pull out a screw and enlarge your cut as necessary to easily find the bracket hole when all are removed.
Score the center hole that the spring arm is recessed into. Then seat the new visor and attach the screws. Early cars (19645 1/2, 1965, 1966 Mustangs) have slots into the rear view mirror for the visor ends.

Later models ( 1968, 1969 and 1970 cars ) have separate clips in the roof, with the rear view mirror attached to the windshield. So the same procedure should be carried out for this area as it applies to your year of Mustang.
That's all it takes to replace Mustang sun visors. Even if you live in the snow belt, most of this procedure can be done in the comfort of your home. So why not start this weekend?
The Complete Mustang Restoration Section
Part 1 - Mustang Restoration
Part 2 -Resurfacing Minor Irregularities
Part 3 - Rear quarter panel repairs
Part 4 - Inner Fender Refinishing and Repair
Part 5 - Mustang floor pan replacement
Part 6 - Floor Pan Replacement Continued
Part 7 - Headliner Replacement
Part 7A - Mustang Headliner replacement part 2
Part 8 - Mustang Dash Restoration
Part 9 - Trunk rust repair
Part 10 - Priming and Painting your Mustang Part-1
Part 11 - Gas Tank Restoration
Part 12 - Color Sanding
Part 13 - Mustang gas tank Installation
Part 14 - Mustang gas tank Restoration
Part 15 - Valve Cover Restoration
Part 16 - Distributor Restoration
Part 17 - Sun Visor Removal and Replacement
Return to Ford Mustang