Valve Cover Restoration
Valve cover restoration is an easy Mustang restoration project that can save you money and is perfect if you are just getting your feet wet in classic car or muscle car restoration.
Whether you just need a little more than a detailing for your engine compartment, or a full restoration on your classic car, this is a project that requires few tools and only a little time to make your stock steel valve covers look like new again !

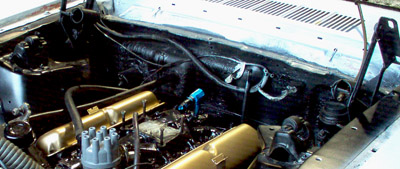
My 1965 Ford Mustang restoration project was bought with some nasty looking original valve covers and engine block, that someone in the 1980's thought would look nice in a very badly sprayed candy apple red.
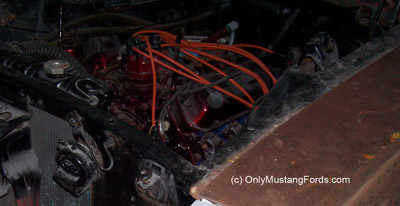
My car was produced at the beginning of what is considered the 1965 Mustang models, but it seems to have some early carryover pieces, such as a generator and front oil tube, as well as most newer parts that would be used to identify it as a post 1964 1/2 car.
Whether some or all of these valve cover restoration parts are original or not at this point, isn't as important as the fact that they look downright ugly in the color the previous owner chose. So they have to go.
This is a nice small project anyone can do with some basic tools, paint and a few hours to spare.
Restoration Supplies Needed:
The list of supplies is small for a project of this size.
- paint stripper
- 1" disposable paint brush
- wire brush
- safety goggles or safety glasses
- rubber gloves
- 180 and 220 grit wet or dry sandpaper
- foam or rubber sanding block
- newspaper
- rattle can of engine paint in your classic car's correct color
- Or small Preval sprayer or airbrush with a pint of your favorite automotive paint
- solvent/degreaser
Correct Colors For Your Classic Muscle Car
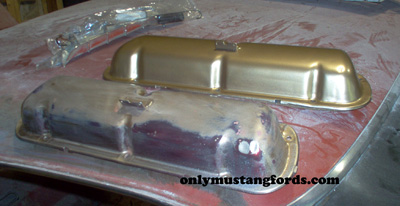
The correct engine and valve cover colors for your Mustang valve cover restoration or other classic car clean up are based on it's production date, engine size and other factors. The 289 V8 in my car should have had gold valve covers, with a black engine block, not the Ford Blue I found on the bottom of the engine and certainly not some drippy candy apple red sprayed over the rest of the motor.
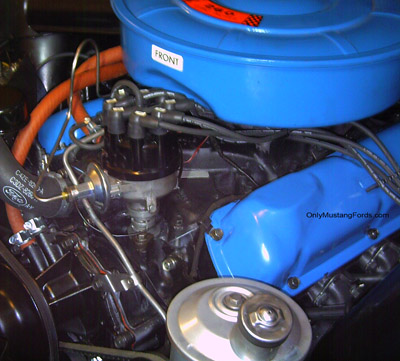
If I had a true 1964 1/2 Mustang with a 260 cubic inch V8, the engine
block would be black and the valve covers and air cleaner would be the
earlier Ford blue engine paint, not the corporate blue coloring seen on
1966 and later cars.
After a closer look at the parts when
removed from the car, I could see that this restoration project included
two parts. First removing the old paint, repairing any rust damage and
secondly finding and painting the parts with the correct colors and
finish.
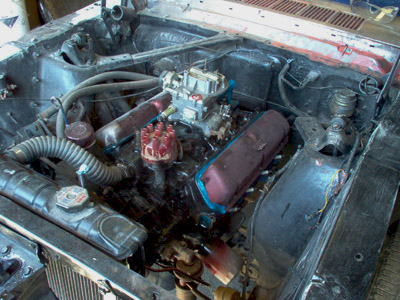
While it's not completely necessary to remove the valve covers to do a decent job on a car that you just want to spruce up, it really makes the prep work a lot easier with them removed, and save masking off the rest of the engine and engine compartment on your Mustang to prevent overspray.
Paint Removal
Paint removal using an over the counter paint stripper is simple and on small parts like this, much quicker and complete than using sandpaper and a block or an electric or air powered sander if you have a lot of work to do to make the surfaces smooth or there is a lot of rust damage.
I got lucky on the valve cover restoration but not so fortunate on my air cleaner restoration.
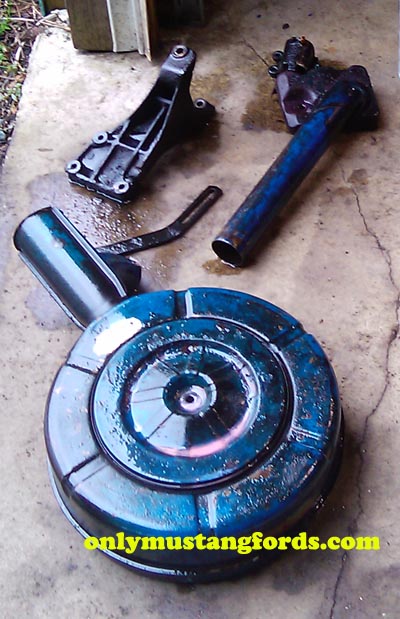
My air cleaner parts needed two applications of paint stripper and use of a stiff wire brush to get it all off, but the whole procedure only took maybe 30 minutes from start to finish.
On flatter surfaces like a valve cover or body parts with broader surfaces, you may want to use a hard plastic spatula, like a drywall spreader, or a bondo spreader. Both will resist the stripper and still be hard enough to clean the paint off, down to the bare metal.
Sanding And Refinishing For Paint
Relatively good paint, or covers with only small imperfections may only need sanding. Following a light coat of gold paint for contrast, I used an air sander for the overall pieces and a block and rolled up sandpaper for the smaller areas.
This process revealed small areas the needed to be either feather sanded or filled with a small amount of body filler.
Rust Removal
Engine compartments get wet and dirty and people who don't love their old cars don't clean the engine compartments. That means, grease, dirt, salt and decay, including rust and flaking paint on your valve covers.
Rust removal for small parts like these is easy so long as you have mostly surface rust to remove. If your valve covers to be restored have rust-outs or holes of any size, you may want to consider buying a better shape original parts, or a whole new reproduction set.
Small issues, such as surface rust can be sanded out with anything from 80 to 120 grit sandpaper, while deeper pitting may need to be touched up with a grinder and filled back to original dimensions.
"Bodywork" repairs
There were some small pits and what looks to be a repair, somewhere in the life of these parts. Either way, to get a nice, clean original looking assembly, a small amount of autobody filler is required to even up the surfaces prior to priming and painting.
Strangely, my parts had several small dents, as well as some pitting from rust, so a couple areas had to be built up to make the surfaces as close to perfect as possible.
Finish these surfaces as you would for any body panel and sand them for a seamless finish to show off that new paint!
Priming and Painting
For small pieces like this, you can either use an airbrush or a rattle can for your valve cover restoration project. You may just be surprised at how nice you can make small pieces like the air canister or valve covers look if you use good technique and keep the paint layers fairly thin.
Use a compatible primer prior to painting for a nice even finish and you're ready for the final step.
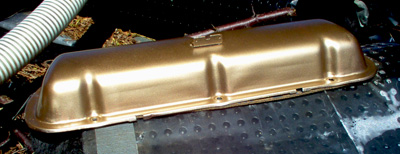
I found the color I needed in a rattle can and sprayed them with 4 coats for good even coverage. Since these parts are metallic, rather than solid colors, like you'll find on most stock valve covers, the extra time involved in finishing them with a couple of good "fog" coats to even out the metallic particles helps them achieve an OEM looking finish.
More Mustang Restoration
Looking for more restoration projects you can do yourself? Check out the other Mustang restoration sections.
Part 2 -Resurfacing Minor Irregularities
Part 3 - Rear quarter panel repairs
Part 4 - Inner Fender Refinishing and Repair
Part 5 - Mustang floor pan replacement
Part 6 - Floor Pan Replacement Continued
Part 7 - Headliner Replacement
Part 7A - Mustang Headliner replacement part 2
Part 8 - Mustang Dash Restoration
Part 9 - Trunk rust repair
Part 10 - Priming and Painting your Mustang Part-1
Part 11 - Gas Tank Restoration
Part 12 - Color Sanding
Part 13 - Mustang gas tank Installation
Part 14 - Mustang gas tank Restoration
Part 15 - Valve Cover Restoration
Ford Mustang Home